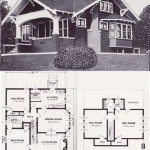
Create Your Own Building Plans
Designing and building your own home can be a rewarding experience. It allows you to create a space that perfectly suits your needs and preferences. However, the process of creating building plans can seem daunting, especially if you have no prior experience.
This article will provide you with a step-by-step guide to creating your own building plans. We will cover everything from gathering your ideas to finalizing the design.
Step 1: Gather Your Ideas
The first step in creating building plans is to gather your ideas. Start by thinking about the type of home you want to build. What are your must-have features? What are your dream features? Once you have a general idea of what you want, start collecting inspiration from magazines, websites, and home shows.
Step 2: Choose a Design Software
Once you have gathered your ideas, you need to choose a design software. There are many different software programs available, so it is important to do your research and find one that fits your needs and budget.
Some of the most popular design software programs include:
- AutoCAD
- SketchUp
- Chief Architect
- Home Designer
Step 3: Create a Floor Plan
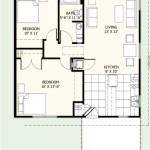
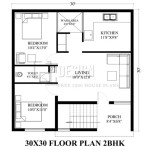
The floor plan is the most important part of your building plans. It shows the layout of your home, including the location of the rooms, doors, and windows. When creating a floor plan, it is important to consider the following:
- The flow of traffic through the home
- The size and shape of the rooms
- The location of the windows and doors
- The overall aesthetic of the home
Step 4: Create an Elevation
The elevation is a view of the exterior of your home. It shows the height and shape of the building, as well as the location of the windows and doors. When creating an elevation, it is important to consider the following:
- The architectural style of the home
- The materials that will be used to build the home
- The landscaping around the home
Step 5: Create a Section
The section is a view of the interior of your home. It shows the height and shape of the rooms, as well as the location of the walls, floors, and ceilings. When creating a section, it is important to consider the following:
- The structural integrity of the home
- The flow of traffic through the home
- The overall aesthetic of the home
Step 6: Finalize the Design
Once you have created the floor plan, elevation, and section, you can finalize the design. This involves making any necessary changes to the plans, such as adjusting the size of the rooms or changing the location of the windows and doors. Once you are satisfied with the design, you can have the plans stamped by an architect or engineer.
Step 7: Get a Building Permit
Before you can start building your home, you will need to obtain a building permit. The building permit process varies from municipality to municipality, so it is important to contact your local building department to find out what is required.
Conclusion
Creating your own building plans can be a challenging but rewarding experience. By following the steps outlined in this article, you can create a set of plans that will help you build the home of your dreams.

Create Floor Plan

Design Your Own House Floor Plans Roomsketcher

Design Your Own House Floor Plans Roomsketcher

Design Your Own Home House Designing Homes

Design Your Own House Floor Plans Roomsketcher

Design Your Own House Floor Plans Roomsketcher

Design Your Own House Floor Plans Roomsketcher

Design Your Own House Floor Plans Roomsketcher

How To Make A Floor Plan

Draw Floor Plans With The Roomsketcher App

